Design ideas are so superior to each other that you shouldn’t be surprised now if you see a laminate flooring that simultaneously performs the function of finishing the floor and the head of the bed in the master bedroom on the wall. This material is so strongly introduced into modern life that it is not difficult for people to find the right application for it in practical or aesthetic terms.
Varieties of laminate for wall decoration
Glue. It is characterized by the fact that no locks are visible on the surface, the edges are even, without roughness. Laminate wall decoration is simple, using liquid nails or silicone. But the dismantling will have to sweat, especially if the panels need to be saved.
Groovy. There are elements with tongue-and-groove locks (hence the name) that form the joints between the panels. Often used to finish the floor and ceiling. It is fixed in the groove of the shunt using small nails or kleimer brackets.
Reference! The castle laminate needs a backing; it does not attach directly to the wall.
Clicky. It has a special mounting system, which is more convenient unlike its predecessors. One panel is attached to another at an angle of 20 degrees. After that, the grooves are joined and the structure is latched. It happens that craftsmen use glue to fasten with a crate and fix the laminate to each other. This option is resistant to mechanical stress. But the created “composition” can break up at any moment. It is more efficient to use clips or self-tapping screws that “tightly” fix the panels.
Pros and cons of laying on the wall
The laminate has plenty of advantages. First of all, it is its environmental friendliness. Also:
- long-term service for up to 10 years,
- forget about overhauls for a long time,
- material stability
- ease of use and maintenance,
- wide range of colors and textures,
- cladding with laminate is not inferior in simplicity even to wallpapering.
 There are not so many shortcomings in the laminate - moisture intolerance and poor reaction to sudden changes in temperature. This means that it is inappropriate to put it in the bathroom, kitchen or hallway. The price also dictates the conditions, pushing the choice of less costly options (plaster, MDF, wallpaper, paint). You can try to save money by choosing material of classes 20-30, they are not so durable, but nobody is going to walk on the walls. According to experts, the laminate contains melamine resin, which adversely affects human health.
If you are going to finish the walls with a laminate, you should purchase a mallet, which is necessary for tapping, because a regular hammer can damage the panels.
Still need:
- the boss through which the strips are knocked out,
- hook - they pull the last strip
- expansion wedges with which they maintain indentation around the perimeter.
Important! With the help of a laminate, you can easily divide the space, breaking the room into several zones. Each will have its own functional purpose.
Given the entire list of shortcomings, it is not recommended to use the laminate in closets, cellars, basements, bathrooms, bathrooms, balconies and kitchens.
Methods for laying laminate on the wall
Horizontal finish (visually expand the space). At first glance it seems to be a very simple option, but there are problems with joints during operation. The joints converge in one line and are fastened with dowels, nails. So that the laminate is well fixed on the wall, and the load is further distributed evenly, the laminate is cut into the same length and width of the strip.
Do not use horizontal installation in rooms with low ceilings. This method is well suited for small spaces.
Laminate vertical finish (will make the room taller). Mounted on a flat wall with glue. For this method, panels of warm, bright colors suitable for the general interior are suitable.
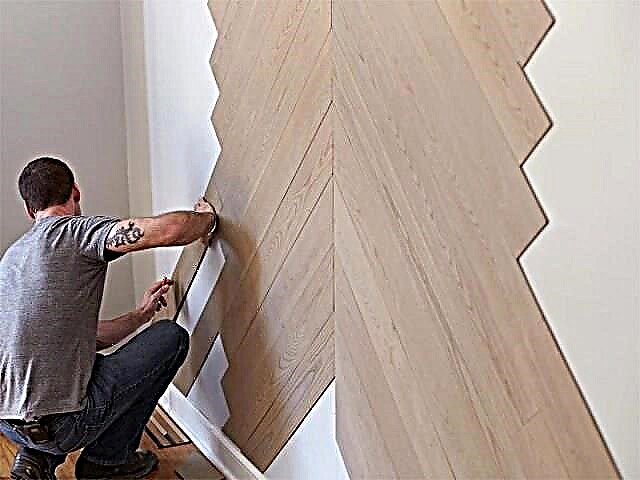
Diagonally. Describe this method does not make sense. The principle of laminate wall decoration is shown in the photo below.
Vertical laying on the wall

Diagonal layout on the wall
Important! You can depart from the rules by creating something original and a little extravagant, combining slats of different colors, textures and patterns.
But the most important thing in the work is preparation (of the workplace, walls and the material itself). Before you start laying the laminate, you should bring it into the room so that it lies down and becomes room temperature. After that, it is worth cleaning the surface, leveling it and creating a frame (if necessary), making a cut, laying the lamellas tightly to each other and fixing the baseboard.
Plywood mounting
 When choosing plywood for walls, take into account the fact that it must be safe, not contain harmful substances and have the most even surface. In residential areas, it is advisable to use FC. Made of birch wood, it is perfect not only for flooring, but also for other surfaces due to its operational data:
- lightness of material
- excellent density
- the natural smell of wood
- simple process
- affordable price.
Reference! This option was recognized by experts as the most successful: a similar solution to wall decoration with laminate will allow you to warm and soundproof the room without much effort.
Proper installation directly depends on the exact layout. The sheets are laid out on even squares, in the process of fixing, free space is left (up to 5 mm) between it, taking into account the possibility of temperature fluctuations.
Important! Be sure to number the sections of the laminate so that there is no confusion during installation.
How to use a laminate to decorate an apartment
 An unusual solution for decorating walls can be a cladding with a laminate. This material is suitable not only for the floor, but also for the vertical surfaces of the apartment. This is a practical and relatively inexpensive way to make the room original.
Features of laminate wall decoration
Facing one of the walls or a fragment of the wall. In some interiors, facing the lower part of the walls will be relevant. Laminate decoration is suitable for the interior in the style of: loft, country, English style.
The location of the lamellas can be horizontal, vertical, diagonal. They can be the same color or consist of different collections.
Laminate Benefits
 Main advantages:
- it is easy to install
- It has a smooth coating that is easy to wash and dust free.
- there are collections with a moisture-resistant coating, they can be used to decorate walls in the kitchen,
- large selection of textures, colors and patterns,
- affordable cost - the thinnest lamellas are used for walls,
- You can hide the irregularities of the wall.
Disadvantages of using
- additional costs - the installation will not work out independently, without relevant experience,
- at low temperatures, the material will deform, so it can not be used in country houses that are not heated in winter,
- when installing lamellas on the crate, it is necessary to decorate the thickness from the wall to the edge of the laminate.
Varieties of laminate that are suitable for wall decoration indoors
 The material differs in the type of outer surface; it happens:
- glossy
- matte
- with imitation of a tile, can be glossy or opaque,
- with a decorative layer from a natural tree,
- with a texture surface.
The laminate also differs in strength classes:
- class 33 is the most durable and more suitable for floors in public areas with a large number of visitors,
- class 32 and 31 is also durable and does not deform after prolonged contact with water,
- class 23, 22, suitable for living quarters,
- class 21 is only suitable for wall cladding: living room, bedroom, corridor.
Laminate is produced with a thickness of 6 to 12 mm, it differs in the type of joints:
- tongue and groove lock - consists of a groove on one side and a special tenon on the other side
- click lock is a simpler type of connection. Here, the tenon resembles a hook in shape, it is angled into a groove and then straightened, and a click occurs. This connection allows you to make the laminate collapsible.
Laminate wall decoration: fixing methods
 The main types of mounting the material on the wall:
- on a crate of wooden slats,
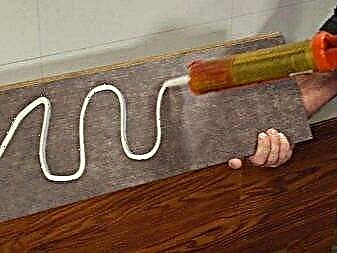
- on glue or liquid nails,
- with kleimers.
The choice of type of fastening depends on the purpose of the room, the condition of the walls. The frame is best used in a spacious room, as in the corridor or small kitchen it will occupy a lot of space.
Installation of the laminate with glue, liquid nails: recommendations
Before installing the material, it is necessary to prepare the surface. If the plaster crumbles or the wall has irregularities, the base should be leveled. Small defects can be fixed by yourself. It can be cracks, small indentations. If the wall defects are significant, then it is better to align it with drywall.
Which glue to choose
 There are several types of glue:
- With weathering - after applying glue to the lamella, it must be pressed against the wall and then removed. The surface should be weathered from 5 to 10 minutes. Then the lamella is glued to the wall.
- No weathering. At first glance, this option saves time, but after gluing two rows, allow the glue to fix. Otherwise, the entire finish may shift under the weight of the upper rows.
Kleimer mount: installation options
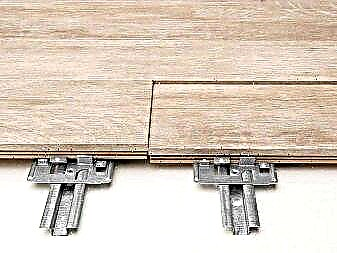
For convenient fastening of the laminate to the wooden frame, you can use kleimers. These are metal clamps that securely hold the panels and provide low mobility of the slats. Kleimers come in many sizes and have a coating that prevents rust. Therefore, they can be used even in rooms with high humidity.
Methods of fastening kleimers
They are attached to a wooden crate or paneling with a fiberboard sheet or plywood with:
- special brackets, for this a construction stapler is used. When pressed, the bracket must fully enter the surface, if this does not happen, you need to drive the bracket with a hammer,
- nails
- self-tapping screws.
First, the Kleimer is installed, and then its horizontality is checked using the level.
The choice of cladding, depending on the wall and dimensions of the room
 Vertical installation of slats is much easier to do. This option is suitable for low rooms and can visually increase the height of the room. Narrow panels are suitable for a small room. For a wide wall, it is better to choose lamellas of large width.
How to glue an adhesive laminate with your own hands: step by step instructions
 Glue the laminate in the following sequence:
- level the wall with plaster or with plywood,
- paste the lamellas from bottom to top in several rows, depending on the glue,
- After installing and drying the glue, the plinth and decorative strips are mounted.
How to fix horizontally: how to stick
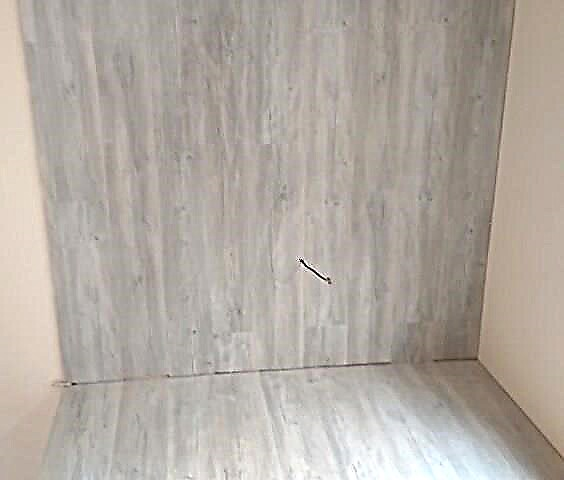
 Provide a small gap between the floor covering and the wall laminate. To do this, draw a horizontal line on the wall surface at a distance of no more than 2 cm from the floor. After gluing the slats, the gap is closed with a plinth.
How to attach the crate: fasteners
The rails are fastened with self-tapping screws in increments of about 30 cm. The rails must be smooth and dried. The rail can be installed by drilling through it and hitting the wall. It can also be mounted using a steel corner with holes for screws. First, the corner is attached to the wall, and then the rail from the side is screwed to the corner.
How to lay a laminate: how to install
It can be attached to surfaces in several ways:
- gluing each lamella separately,
- with kleimers,
- small nails that are nailed to the bar, this option resembles the installation of lining.
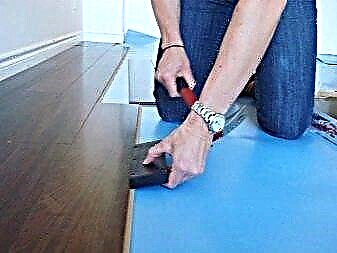
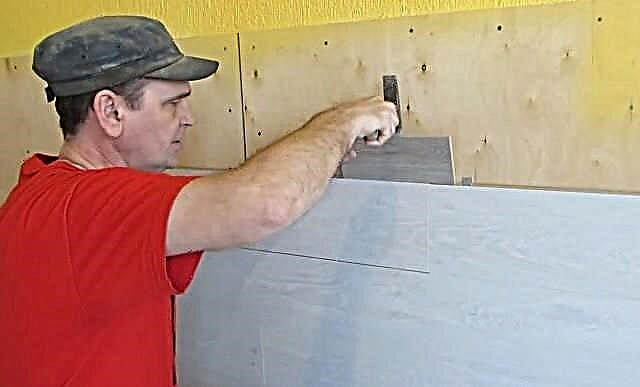
First, the lamellas are covered with glue, then they are inserted into the lock and pressed to the surface. After that, gently tap with a mallet.
Tips and tricks of professionals
 The outer corner of the laminate is usually decorated with a corner. Also, some manufacturers produce a special profile with which you can make the corner more accurate.
Thicker lamellas are easier to install, but use the thinnest lamellas for wall cladding.
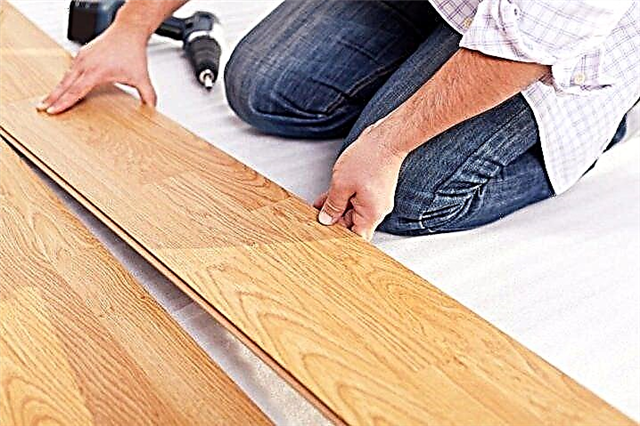
For ease of installation, it is advisable to cut and lay out the slats on the floor. If the floor area does not allow, then it is possible to lay out two or three rows on the floor, gradually transferring the details to the wall.
You can use the laminate not only for the floor, but also for the walls. Here you can combine different shades and use thin lamellas of a sheet piling or clink laminate.
Coating features
Laminate wall decoration is unacceptable for kitchens, because under the influence of excessive moisture and temperature spikes, it swells and warps. There is no way to avoid such influences; there is no protection against them. The same reasons do not allow to recommend this coating for cellars, basements, closets. But in the hallways, where deviations from normal room conditions are rare and insignificant, such a finish is quite acceptable.


Laminating a balcony is not a good idea. No matter how hard they try to equip the premises, a change in conditions from season to season will certainly affect the coverage.
It is possible to adjust the strip of the clique product precisely only with the help of a tool; no efforts will be enough to do it manually. The boss is most often applied and it is already hit with a hammer, so that uniformly distributed force is obtained.
Putting a laminate on a wall is also possible with the help of a rule (hook), erroneously called individual clamp clamp masters. Indentation on the outer border is created by spacer wedges, and it is advisable to have a double set of such tools in case of failure. It is most reliable to make the wall covering a laminate with the help of a crate, this will help to achieve high strength, strengthen sound insulation and thermal insulation. But keep in mind that design will inevitably be limited. The glue method only helps to form the original design.
Laminate flooring is very durable (it lasts so long that you will not wait for wear and, rather, just want to change the situation). Moreover, the coating is completely safe and can be disposed of in the simplest way. Decorating walls with a laminate is much more economical than using wood, and even lining or MDF, but it is not inferior to them in external elegance. There are a lot of textures and colors mastered by technologists, and they will fit into any interior you like. An important factor is easy care. Only occasionally will you need to rub the wall with polish.
What if the walls are uneven?
First of all, you need to carefully check whether they are really uneven. Take a rack, the size of which is equal to the height of the wall without taking into account the baseboard. Important: before starting the test measurement, the plaster layer, the platbands should be removed so that they do not distort the result. The rail is moved vertically, the slightest bulges and dips are marked with a pencil. The protruding parts must be scraped off or knocked down with a chisel.
The pits are filled with putty and rubbed. Such simple methods will strengthen even the most uneven and chaotic wall. To assess how smooth the control rail itself is, is also not difficult. Attach it to the wall and draw a pencil around the outline, rotate it 180 degrees and attach the ends of the rail to the end points of the line.With the complete coincidence of both lines, you can safely use this tool in your work. But the slightest deflection or kink indicates that you need a different rail (which, of course, is checked in the same way).


How and how to fix it?
Fixing the adhesive laminate should take place on a flat surface. To hold, use liquid nails or building silicone. The underside of the panel is covered with glue in the form of a zigzag, after laying the strip with the same glue, smear the end face, proceed to the next chain. If the adhesive liquid protrudes at the boundaries of the blocks and lines, it is immediately cleaned with a soft cloth made of natural fabric soaked in culinary acetic acid.
The laminate, which is put on glue, cannot be fixed on the crate, it has too little contact strip with the support.

The sheet pile type of laminate is equipped with the lock of the same name. It is permissible to unfold this coating without lubrication with tongue and groove adhesives. Therefore, the boundaries of individual boards will not be stained with adhesive. If you do not want to glue at all, you can nail the product to the surface in the manner of an ordinary lining. It is attached to a wood grate with furniture studs or stamps (the second option is also suitable for an iron base).
For wall laying, you can also use a laminate of a click format - this is an improved version of a sheet piling. The ridge cut is pear-like, as is the structure of the canals. Connecting constructions push the comb part of the lock into the niche, having previously inclined the block. Then they twist the product to the base and at the same time lightly press, so that the lock closes. Click type laminate is good in high hardness.

Click-coated graders are not compatible. If they are used, it will not work to snap the lock. But it is quite possible to glue the block on a wooden crate on your own.
Ways
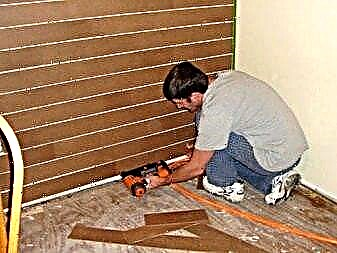
You can attach the laminate to the walls either with glue and liquid nails (but you will need to thoroughly level the base and primer it), or with the help of a battens (but it will take up part of the space, therefore it is not recommended in small rooms). If you decide to nail the coating on the entire wall or on its upper part, the work starts from the ceiling to the floor, the decoration of the lower half of the walls is from the floor up. To ensure that the slats are fixed thoroughly, check the correctness of their installation using the building level. When there are locks in the panels, they should be glued as follows: first glue the surface with glue, then connect it to the lock, and only then attach it to the wall.
If you think that one glue is not enough, an additional reinforcement of the structure with nails or brackets is permissible. The tongue and groove board is attached to the crate by the clamps on the top and bottom.
Additional items
The selection of items to strengthen and hold the structure is crucial. The most ordinary Kleimers seem to be available in a wide range, and if you purchase the wrong product, you will depreciate all your work. The thicker the panel you need to hold, the larger the diameter of the tongue should be. Compared to other types of mechanical fasteners, kleimers are valuable for the low risk of splitting panels. They are great even in rooms with significant humidity. The bracket with a serrated protrusion is hammered into the board and held by self-tapping screws, a bracket with a flat protrusion will help to press the protruding part of the click lock to the wall or to the crate.
When choosing liquid nails, be sure to specify the scope of their application. They are both universal and designed for internal work. Very dense laminate on the walls do not fasten, because it makes no sense to use liquid nails to hold heavy objects. Acrylic composition cannot be used at low temperatures.


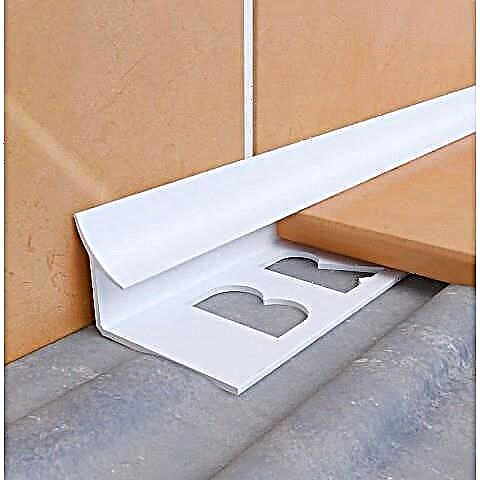
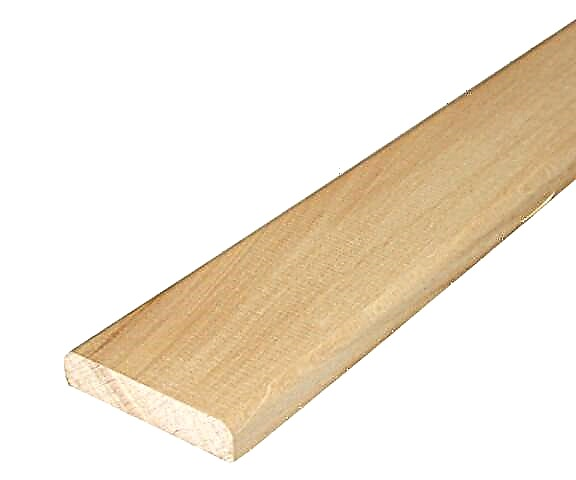
Close the end of the laminate on the wall is not so simple, but this problem is solved. According to experts, profiles in the form of the letter P will help, which are made of a variety of materials - there are aluminum, plastic, and even wooden. As an option, you can purchase a flexible rubber sill. You can attach all these blocks with the same liquid nails or glue-sealant. Edge ribbons are sometimes also offered, but any method should not violate the color harmony of the canvas.
A separate topic is the guides for wall mounting of the laminate, the step between them should not be done more than 0.6 meters.

How to stack?
Laminate becomes wetter and swells. And because no matter what installation method you choose, be sure to make a gap of 1.5-2 centimeters from the corner on the entire perimeter. Spacing wedges on the walls can help with this, but there is a much better solution. Bottom lay completely flat boards or slats of the required thickness, which are wrapped in a thin plastic film. And on the sides you can already safely use the wedges, there they will not be squeezed out by the weight of the casing.
Experts recommend that after completing work, lay out a skirting board in the gaps, so as not to accumulate debris and dirt there.
Laying of paintings should begin from the far left corners, it is conducted in the course of hours. Lefties will be more comfortable working on the right against the clock. Installation of laminate flooring is allowed both vertically (from left to right) and horizontally, with the second method being preferable. Whole stripes, contrary to imaginary evidence, are by no means easier or cheaper. The joints running along the same line must be covered with skirting boards mounted on mounting nails.
The technology involves drilling mounting holes directly through panel joints. And even when they clad a wall with continuous bands along its length, have to put skirting boards every 170 centimeters or more often. Non-breaking panels support each other only in one direction, and if there is no additional reinforcement, the lining can be folded.
No matter how well you try to mount the coating, no matter what high-quality nails, markers and glue are used, these retaining elements may cease to fulfill their function. Excessive convergence will create increased mechanical stress.
It is best to lay the laminate by combing: in the middle exactly as many strips are cut as would fit in half of the horizontal rows. When ten lines can be laid in height, five strips are required to cut. Installation is variable: a solid part, then cut, again a whole block. Such a solution will make the load on the fasteners as uniform as possible.
In some cases, it will be more interesting to lay out the laminate in a diagonal way, then it is taken in two different colors. But if you do not have solid experience in working with such a coating or special training, undertaking diagonal laying is not recommended. Putting the coating vertically on the glue is noticeably easier: you will certainly have to clean and level the wall, but you will not pay for the elements of the crate. You can confine yourself to panels of only two types (long and complementary).


To install a laminate with your own hands, be sure to buy an electric jigsaw, it will help cut the panels as accurately as possible, and in the future it will come in handy for other works. You will also need consumables, a hammer for tamping, a short (up to 40 cm) ruler and square, roulette, restrictive wedges, a block for tamping, angle cutter, saw, drill and punch. To finish the laminate wall, which was previously glued with wallpaper or painted, with a spatula or punch with a nozzle cover is removed. The final removal of irregularities is achieved with sandpaper.
Having decided to create a wall with a backlight, immediately lay all the cables, draw up a diagram with their location and output points (connections) so as not to get confused in the future.
Which laminate on the wall to choose?
The choice of laminate for walls is slightly different from the choice for laying on the floor. First of all, this concerns the wear resistance class. Therefore, before buying a material, you should pay attention not only to the manufacturer, but also to the marking of the product class. The class is marked with numbers from 31 to 34 and indicates the wear resistance of the material. That is, the greater the permeability in the room, the higher the product class is needed. In the case of the floor, these indicators cannot be ignored, and when laying the material on the wall, this does not matter.
The optimal classes of laminate flooring for residential premises are 32 and 33.
When choosing a material for the walls, you can save and purchase a laminate 21,22,23 or 31 classes. Lower values (21, 22 and 23) mean that this material is less wear-resistant, but no one will walk on the walls anyway.
The manufacturer is better to choose European (Sweden, Germany) or Russian. Chinese may disappoint due to inconsistent labeling on the packaging and the presence of harmful substances in the product. The American should be excluded, if only because the final price of the material increases significantly after a long transportation.
Wall and laminate preparation
The installation process of the laminate occurs on a perfectly flat wall. The vertical surface must be dry. If there are any cracks or chips, they are usually putty or “sewn up” with drywall.
Laminate panels themselves, before starting repair work, must lie down for 48 hours in order to accept room temperature and not give unpleasant "surprises" to the owner during and after installation.
Installation process
Laying of laminate panels must be done after installing the battens. A wooden lath (25x40 or 30x40 mm) with a step (interval) of 40-50 cm is usually used. In this case, an indent of 1 cm from the floor and ceiling (with a vertical crate) or from the walls remains.
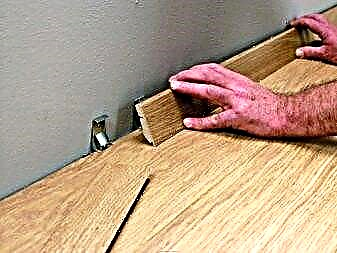
The evenness of the future renovated wall is determined using the building level. With a horizontal arrangement of panels (vertical and diagonal occurs), installation starts from the bottom in a checkerboard pattern with the groove up. The bottom of the first row of products necessarily "fits" on the screws (they will then be closed with a plinth), even if the adhesive method of fastening is selected.
The clutch of the panels is carried out by kleimers and glazing beads or finish nails driven into the groove edge at an angle of 45 degrees. The connection of the bands occurs after a characteristic click. A neat fit (tapping) of the material is also used for a tight connection.
The correctness of the work is checked by the level after each row. The final row, if necessary, is cut along the length of the product, achieving the required width.
Recommendations
- The voids between the wall and the panels (due to the battens) are filled with heat and vapor barrier.
- It is undesirable to install the laminate on a bare (without crate) wall, because in the absence of a ventilated space there is a high probability of condensation and, as a result, mold and rotting of the material.
- Although laminate is moisture resistant materials (due to its constituent components), water in its direct manifestation is fatal to it. Accordingly, wet cleaning in relation to it is acceptable, but within a reasonable and accurate range.
- Before installation, the wooden crate is treated with fire-retardant compounds.
- Expanded polystyrene and Europlex (Isopink) as a heat and sound insulation in residential premises should not be used for two reasons:
1. High degree of combustibility with the release of toxic substances into the atmosphere,
2. The components of both during operation are harmful to the human body.
Do not be afraid of experiments with the placement of the laminate on the walls of the apartment. Such a design decision will highlight your interior among the many monotonous apartments of the Soviet era. Choose the right laminate, follow our installation recommendations and you will get a modern, beautiful interior in your home.
Laminate wall design
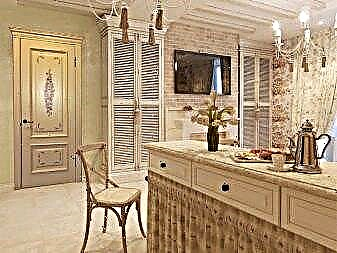
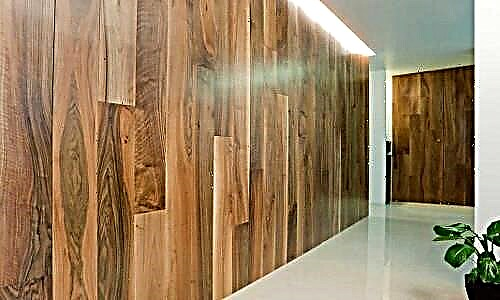
Laminated products have a fairly large assortment of color solutions for transforming an apartment or office.
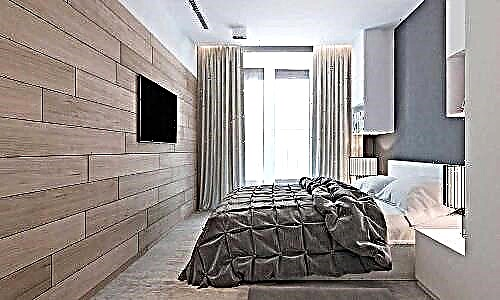
The kind of natural wood on the walls, the structurality of the panels gives the room a special charm, demonstrating the refined taste of the owners.

Every year, more and more often they began to use the laminate to finish not only the walls, but also the ceiling, which provides an original and cozy appearance of the room, giving it a peculiarity and aesthetic warmth.

It is also used as a sheathing of individual fragments of the interior, emphasizing a certain area of the room, for example: an apron in the kitchen or an area for the TV.

Laminate flooring products were originally intended for use as a subfloor coating, where the material's wear resistance class is of great importance.
The floor in any room is subjected to much greater loads than the walls, so all laminated boards have high strength and reliability.
Walls are not subjected to such loads, therefore, the material will last a longer time.
Any laminate, including thin, and with a lower wear resistance class, i.e. for these purposes, cheaper products can be purchased.
Wall decoration with laminated boards is gradually gaining popularity among modern designers, but not all consumers are aware of the benefits of this material.
Laminate wall decoration
Laminate the walls first of all to decorate the room.
The wear resistance of this coating creates good protection of the walls from various influences, while maintaining their original appearance for a long time.
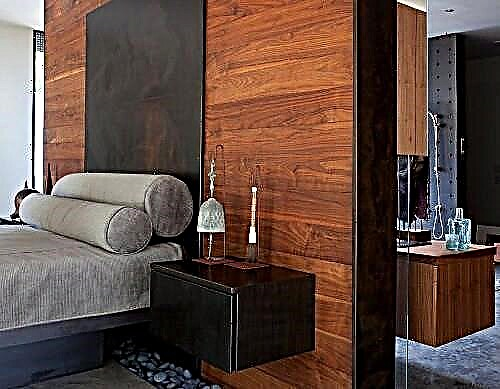
The original appearance of the room is provided not only by the material itself, but also by the variety of wall cladding methods, which is limited only by your imagination and the skill of the master.
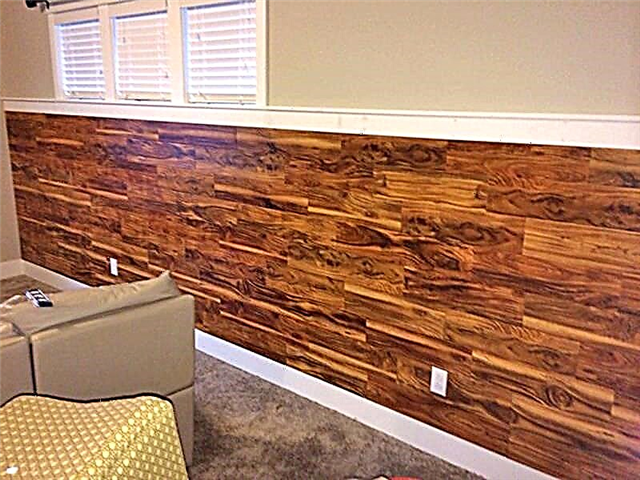
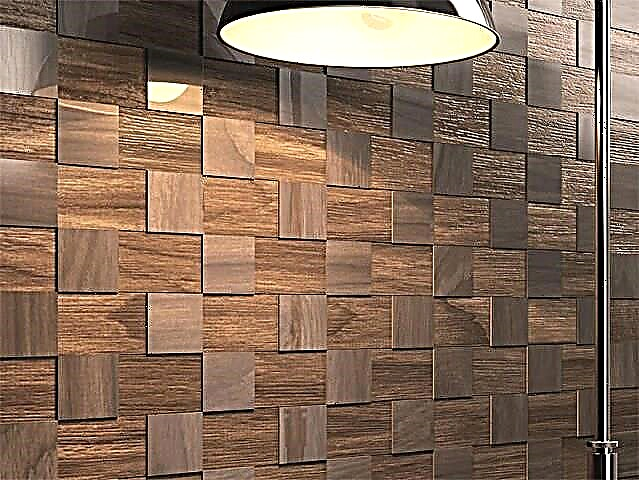
Lamels on the walls can be placed along the entire length, width of the wall horizontally, vertically, diagonally, Christmas tree, ladder, staggered, bricks, etc.
Design can be done as the entire wall, and its individual sections, bottom, top, side, etc.

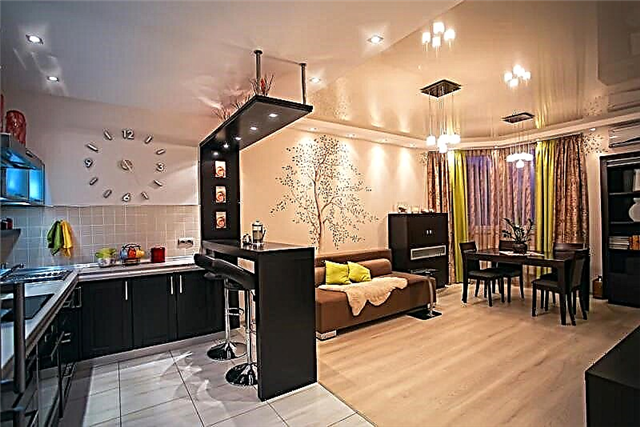
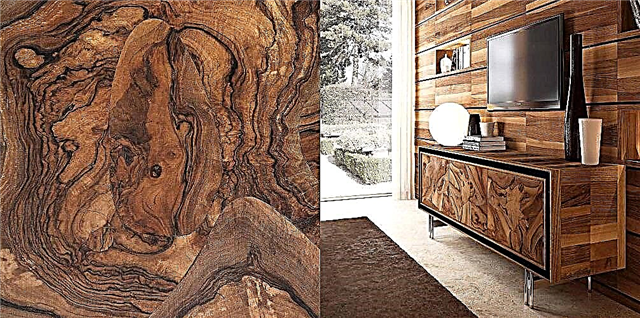
Using different options for combining light and dark laminated panels give the room a completely new look.

You can also make various additional inserts in the form of squares, rhombuses, circles and other figures from the same material, for example, as shown in the picture below.
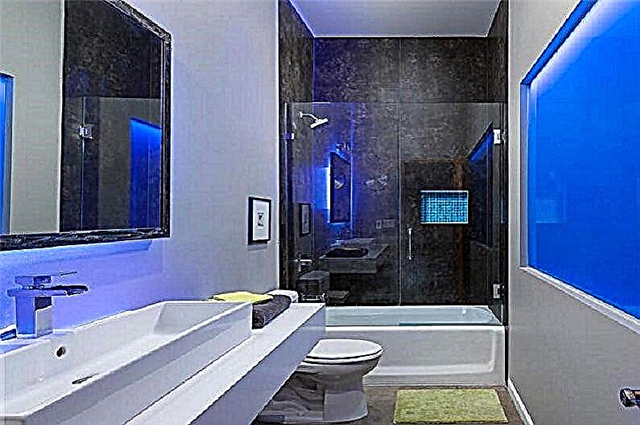
The laminate on the wall looks great in any room: in the bedroom, in the living room, in the dining room, in the kitchen, etc.
In rooms with high humidity should be installed moisture resistant products.

It can be seen from the above photographs that on the wall this material looks very elegant and unique beautifully, but the question arises of how to fix the laminate on the wall if it is a floor covering.
Laminate mounting on the wall
The laminate is mounted on the floor by means of the corresponding locks, which successfully cope with their task if the lamellas are laid on a horizontal surface.
When laying laminated products on the wall, the locks will not be able to keep them upright, because they are not intended for this.
Moreover, some locks can interfere with the installation of the laminate on the wall, creating some inconvenience to the master.
Therefore, the fastening of the laminate to the wall is realized, in other ways, using the following materials:
- kleimers,
- screws
- staples
- glue.
Installation of laminate on glue or self-tapping screws
A vacuum cleaner is used to clean the surface of the walls, then the base is primed. If the walls are made of wood, lamella layers are strengthened with self-tapping screws. Otherwise (if cement plaster) we use adhesive. As a substrate, you can take heat-insulating material, it will perform a shock-absorbing function and hide irregularities.
Reference! Laminate is attached to glue in case the surface of the wall is quite even.
Do not neglect the heaviness of the lamellas, after puttying, a primer should be applied to the wall, for better adhesion of the glue. It is very important to give the glue time for weathering so that it has time to “grasp”, if this is not done, then the panels under the weight of the upper rows can shift.
Cladding
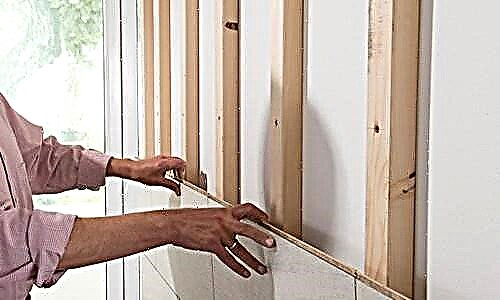 The traditional way is to install the laminate on the crate. It allows you to carry out additional work on the sound and heat insulation of the room. Those. lamellas are laid out on the basis of a frame created from battens and beams. But if you use a laminate in order to decorate the space, then you should resort to the option with gluing panels. The skeleton method eliminates the need for careful surface leveling. There will be no need to spend time on plastering or installing drywall.
For a wooden frame, slats up to 40 cm wide are suitable, they must be installed perpendicular to the location of the slats at a distance of 30 cm from each other. Also suitable is a variant with a metal crate of walls (a profile designed for gypsum plasterboard ceilings).
Laminate sheathing begins to be done from above, measuring the distance from the ceiling in one board.
Conclusion
Laminate in Russia appeared recently, but has already managed to gain recognition among many masters. After all, its attractive sides completely "cover" the shortcomings. You can safely experiment with this material, come up with new design solutions without fear of disappointment. This can be seen from our own experience, acquiring even the cheapest product of low strength.
Choosing a mounting method
The choice of a suitable fastening method is primarily affected by the material of which the wall is made and the indicator of its evenness.
The permissible error in the wall plane should not exceed 2-3 mm per linear meter.
The second factor affecting the mounting method is the material of the laminated product itself.
Laminate on a wooden base is attached to the wall by any of the methods described above, and a combination of several options at the same time is allowed.
Vinyl laminate can only be glued, as other options may damage the panels.
Before starting the wall cladding, we determine how the internal and external corners will be closed.
The ends and corners can be smoothed with duralumin profiles or corners for tiles suitable for the thickness of the laminate.
If necessary, install them, and fix with screws or glue mortar before installing laminated panels.
When installing the laminate to the wall, the edges of the panels are inserted into the groove of the corner so that everything is smooth and accurate.
Kleimer mount
Fastening with kleimers is possible only to such walls into which you can drive in a nail, screw in a self-tapping screw or snap on a construction bracket.
Since it is with these fasteners that the Kleimer is fixed to the base.
Kleimers are a special bracket that has a clamp and holes for fastening with screws, nails or construction brackets.
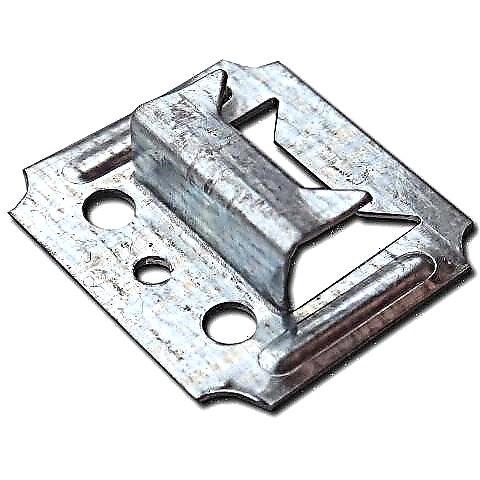
Kleimer has three holes for fasteners: two identical at the edges intended for fastening with construction paper clips, one in the middle for fastening with nails or self-tapping screws.
Kleimers should be selected in accordance with the thickness of the scallop of the laminated board so that they fit tightly on it.
Laminated panels are made with different types of locks, so in some cases, to fit the kleimer on the scallop of the laminate, you will need to grind the door locks of the castle or completely cut the locks.

We cut locks using a chisel.
To do this, set the edge of the chisel along the castle ledge, and carefully cut the lock back and forth along the board.

The lock can also be cut with a construction knife.
As a result, the scallop of the laminate will be even and the kleimer will easily fall on it.
Before buying laminate flooring and kleimers, we recommend that you check how they fit together.
Otherwise, you will have to perform additional work on the processing of scallops, and this takes a lot of time and effort.
After we are convinced of the good fit of the Kleimers, we proceed to the installation of the first row.
To do this, we horizontally mark the walls using the level, determining the position of the first row.
Next, we put spacer wedges or laminate trimmings under the first row.
Then we install the first lamella so that there remains a dilatation gap between the longitudinal end of the panel and the floor.

We install three or four kleimers at an equally placed panel at an equal distance between each other.
For example: two at the edges, indented from the edge of about 4-7 cm and one or two in the middle.
Each kleimer should fit snugly against the comb panel.

Next, we fasten all the clamps with self-tapping screws through the holes intended for this.
So we fix the first row, after which we proceed to the installation of the second and subsequent rows of the laminate.
When joining subsequent rows, we carefully monitor that there are no gaps between the panels.
If gaps are found at the joints of the panels, take a piece of laminate, install it in the groove of the last panel, and gently knock it with a hammer or a mallet along the edge of the trimmer.
The use of cropping is necessary so as not to damage the edges of the installed panels.
The lamellae can also be beaten with the palm or fist, directly along the edge of the laminate, but this is fraught with the fact that at the end of the work the arm will hurt.
So we eliminate all the gaps so that the ends of the panels are tightly interconnected.
Then we proceed to fixing the Kleimers, and continue all these actions to the last row.
The last row is extremely difficult to fix on kleimers, so we attach it to the wall with a special glue, sealant or liquid nails.
Fastening with screws, staples or nails
The fastening of the laminate to the wall with self-tapping screws differs from the previous one in that we do not use kleimers or something like that.
With this method, we screw the screws directly into the long scallop of the laminate.

With this method of fastening, you do not need to buy kleimers, i.e. This option is cheaper.
We fasten the lamels to the wall with screws through the scallop with a step of 30-40 cm.
But we do not recommend this mounting option, as in this case, there is a high probability of delamination of the edge of the scallop.
As a result, all the work will go down the drain, and as a result, the finishing material can peel off from the wall.
When choosing this method of fastening, one important rule should be observed.
Before screwing the self-tapping screw into the comb of the panel, be sure to drill a hole 1 mm smaller in diameter than the thread of the self-tapping screw.
And already in these holes we twist the screws.
This action will protect the scallop from delamination in the process of screwing a self-tapping screw into it.
Similar mounting on nails or staples is also allowed.

For reliability of fastening on the back side of the panels we apply an adhesive.
Fixing with glue or liquid nails
As glue, you can use special glue, sealant or liquid nails.
Gluing the laminate to the wall is one of the easiest and most effective fixing options.
Even a schoolboy can apply adhesive to the back of the lamella and firmly press it to the wall.
The main thing is to do everything strictly according to the instructions of the adhesive material.
In order for the laminate to adhere securely, the wall surface should be carefully prepared.
The preparation work depends on the condition of the wall.
We clean the painted wall from paint and plaster with a spatula to the very base.
Concrete walls and drywall walls are usually even, so it is enough to brush off the dust with a dry brush or rag.
After that, we process the wall surface with a deep penetration primer, which will ensure reliable adhesion of the adhesive to the base.
For priming, use a wide brush or roller.

We are waiting for the primer to dry completely, it will take a couple of days, and only after that we proceed to the installation of the laminate on the wall.
Under the influence of a temperature difference, the laminated boards expand and contract, therefore dilatation gaps should be left along the laying perimeter of 5-10 mm in size and use special adhesive material designed for the laminate.
As in previous cases, we make the appropriate marking of the wall, cut the lamellas of the required size, taking into account the expansion joints.
You can cut laminated boards with a jigsaw or a small file designed for cutting this material.
Upon completion of all preparatory work, we begin the installation of the first row.
The first row should be located as evenly as possible, horizontally, vertically or diagonally, depending on the installation method.
We provide evenness with the help of the level and marking, which was a step earlier.
Laying the first panel we produce a large longitudinal ledge (comb) to the subsequent panels.
Liquid nails should not be applied with a snake, but precisely along the perimeter of the panel, so that the effect of a board nailed to the wall is present.
For greater reliability, you can add a third row of glue along the middle of the lamella.

After applying the glue, we install the panel in place, and press it against the wall.
For a tight fit of the board to the wall, tap it over the entire area with a mallet, fist or palm, providing this action with a reliable glue glue.
Each glue has its own specifics, i.e. the cohesion and hardening of some compounds takes a very long time, and there is the possibility of collapse of the upper rows.
To prevent this from happening, we recommend installing the laminate on the wall for 5-8 rows per day.
We insert the subsequent lamellas into the groove of the previous one and sheathe the entire wall in this way, in accordance with the design idea.
Leveling the walls under the laminate
We smooth small irregularities with putty or plaster.
With large differences on the wall, alignment is done with sheets of plywood, OSB or drywall.
In this article we will describe the leveling process with the help of a crate, as an example we will give a vertical way of mounting a laminate on a wall.
The crate can be made of wooden bars, battens or from a profile for drywall.
In our case, for the lathing, as guide strips, we use a regular smooth platband 12 mm thick.
First of all, we do horizontal marking of the wall with a step of 40-45 cm between the rows of planks.

In the strips, previously, at equal distances, we drill holes for fasteners with a diameter of 2-3 mm.
This is necessary in order to easily get self-tapping screws into the dowels driven into the wall.
Then, according to our marking, we drill holes in the wall under the dowels.

We drive dowels into the drilled holes.

Next, we take the strips, with drilled holes, and fasten them with screws in the dowels driven into the wall.
To align all the planks in one plane perpendicular to the floor, use the level and rule.
If necessary, increase or decrease the indentation of the strips from the wall with the help of linings made of material of different thicknesses (laminate trim, cardboard, etc.).
So we bring all the strips in one plane, and fix them to the wall with screws.
As a result, the crate is ready, providing a flat surface on which we will fix the laminate.

Next, we cut the laminate of the required size, and connect the individual parts of the panels with the ends to each other so that a single line is obtained along the entire height of the wall.
Then we apply the adhesive on the strips screwed to the wall, and apply the first vertical line of the laminate to them.

We achieve full verticality with the help of a level.
So that the lamellas do not move and fall, we fix them through the scallop with construction brackets to each plank.

By analogy, we mount the subsequent rows.
As a result, we get a beautiful smooth wall sheathed with laminate.
Ends and corners are closed with metal or plastic corners and profiles.
The joint of the floor and the wall is framed by an ordinary baseboard.